- Published on
Expanding TrueNAS Scale with a new drive
- Authors

- Name
- Daniel Demmel
- Occupation
- Software engineer with
21 years of professional
experience
Motivation
This is a follow-up post to Installing and configuring TrueNAS Scale for home use in which I wrote up how to set up TrueNAS Scale on a micro PC. Now I will show you how to expand the storage capacity by adding a new drive.
Since TrueNAS Scale is using ZFS, this isn't as straightforward as just plugging in a new disk and formatting it. You have a lot of different options and it's useful to know why would you choose one over the other.
Installation
I'll not go into detail about how to install the drive hardware itself, if you also have a micro PC you can refer to my Build a cheap but fast home NAS system post, I just used the remaining 2.5" SATA slot to get an additional 4TB SSD. Annoyingly, this was more expensive (£200 as of July 2024) than the more modern M.2 NVMe drive I got earlier, but such is life!
Configuration
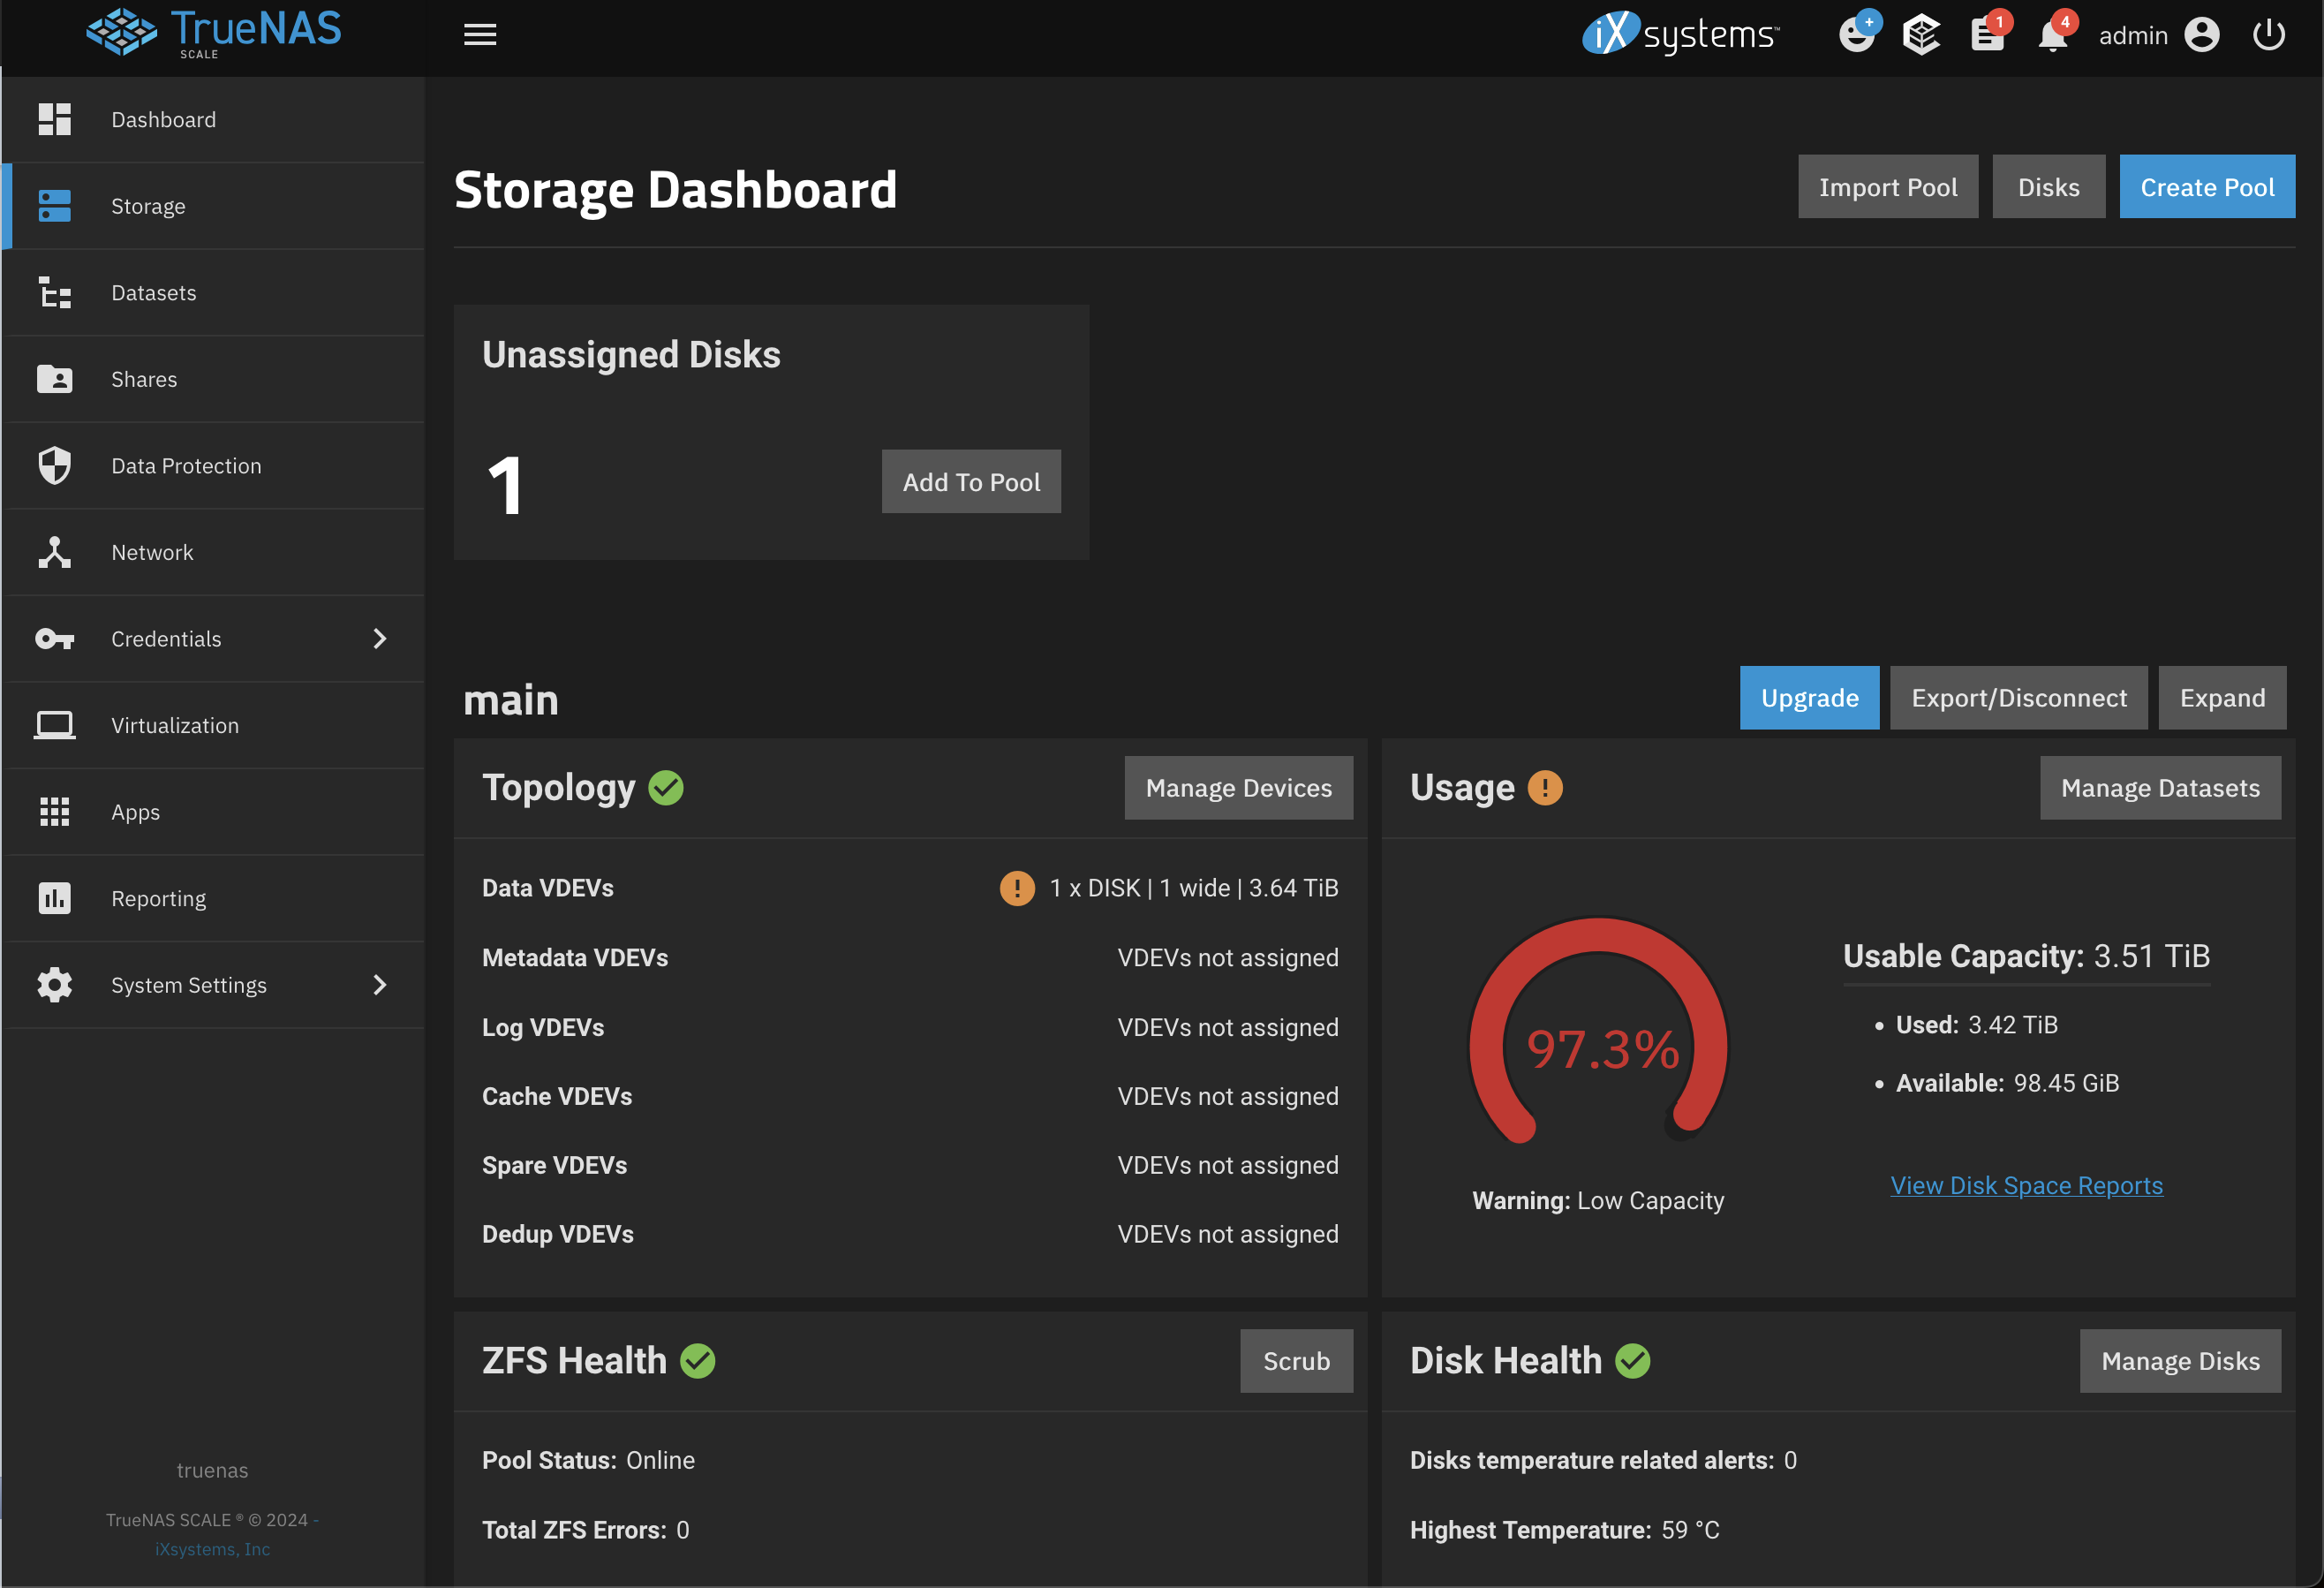
Once you have your new disk installed and powered on, TrueNAS Scale should automatically detect it. You can check by going to Storage and you should see the new drive listed as Unassigned, which means it's not currently being used by any pool or dataset.
Now the button next to it says Add To Pool, but it's a trap! Of course, you can add this drive to an existing pool, but if you want to expand the amount of storage, there's a serious consequence. It would actually be quite convenient to have the two drives in the same stripe and show up as one, big pool, but the massive downside is that if any one of the drives fails, your entire pool might be lost.
So what I did instead is to click Create Pool and go through the wizard to set up a new pool and add the disk into that instead.
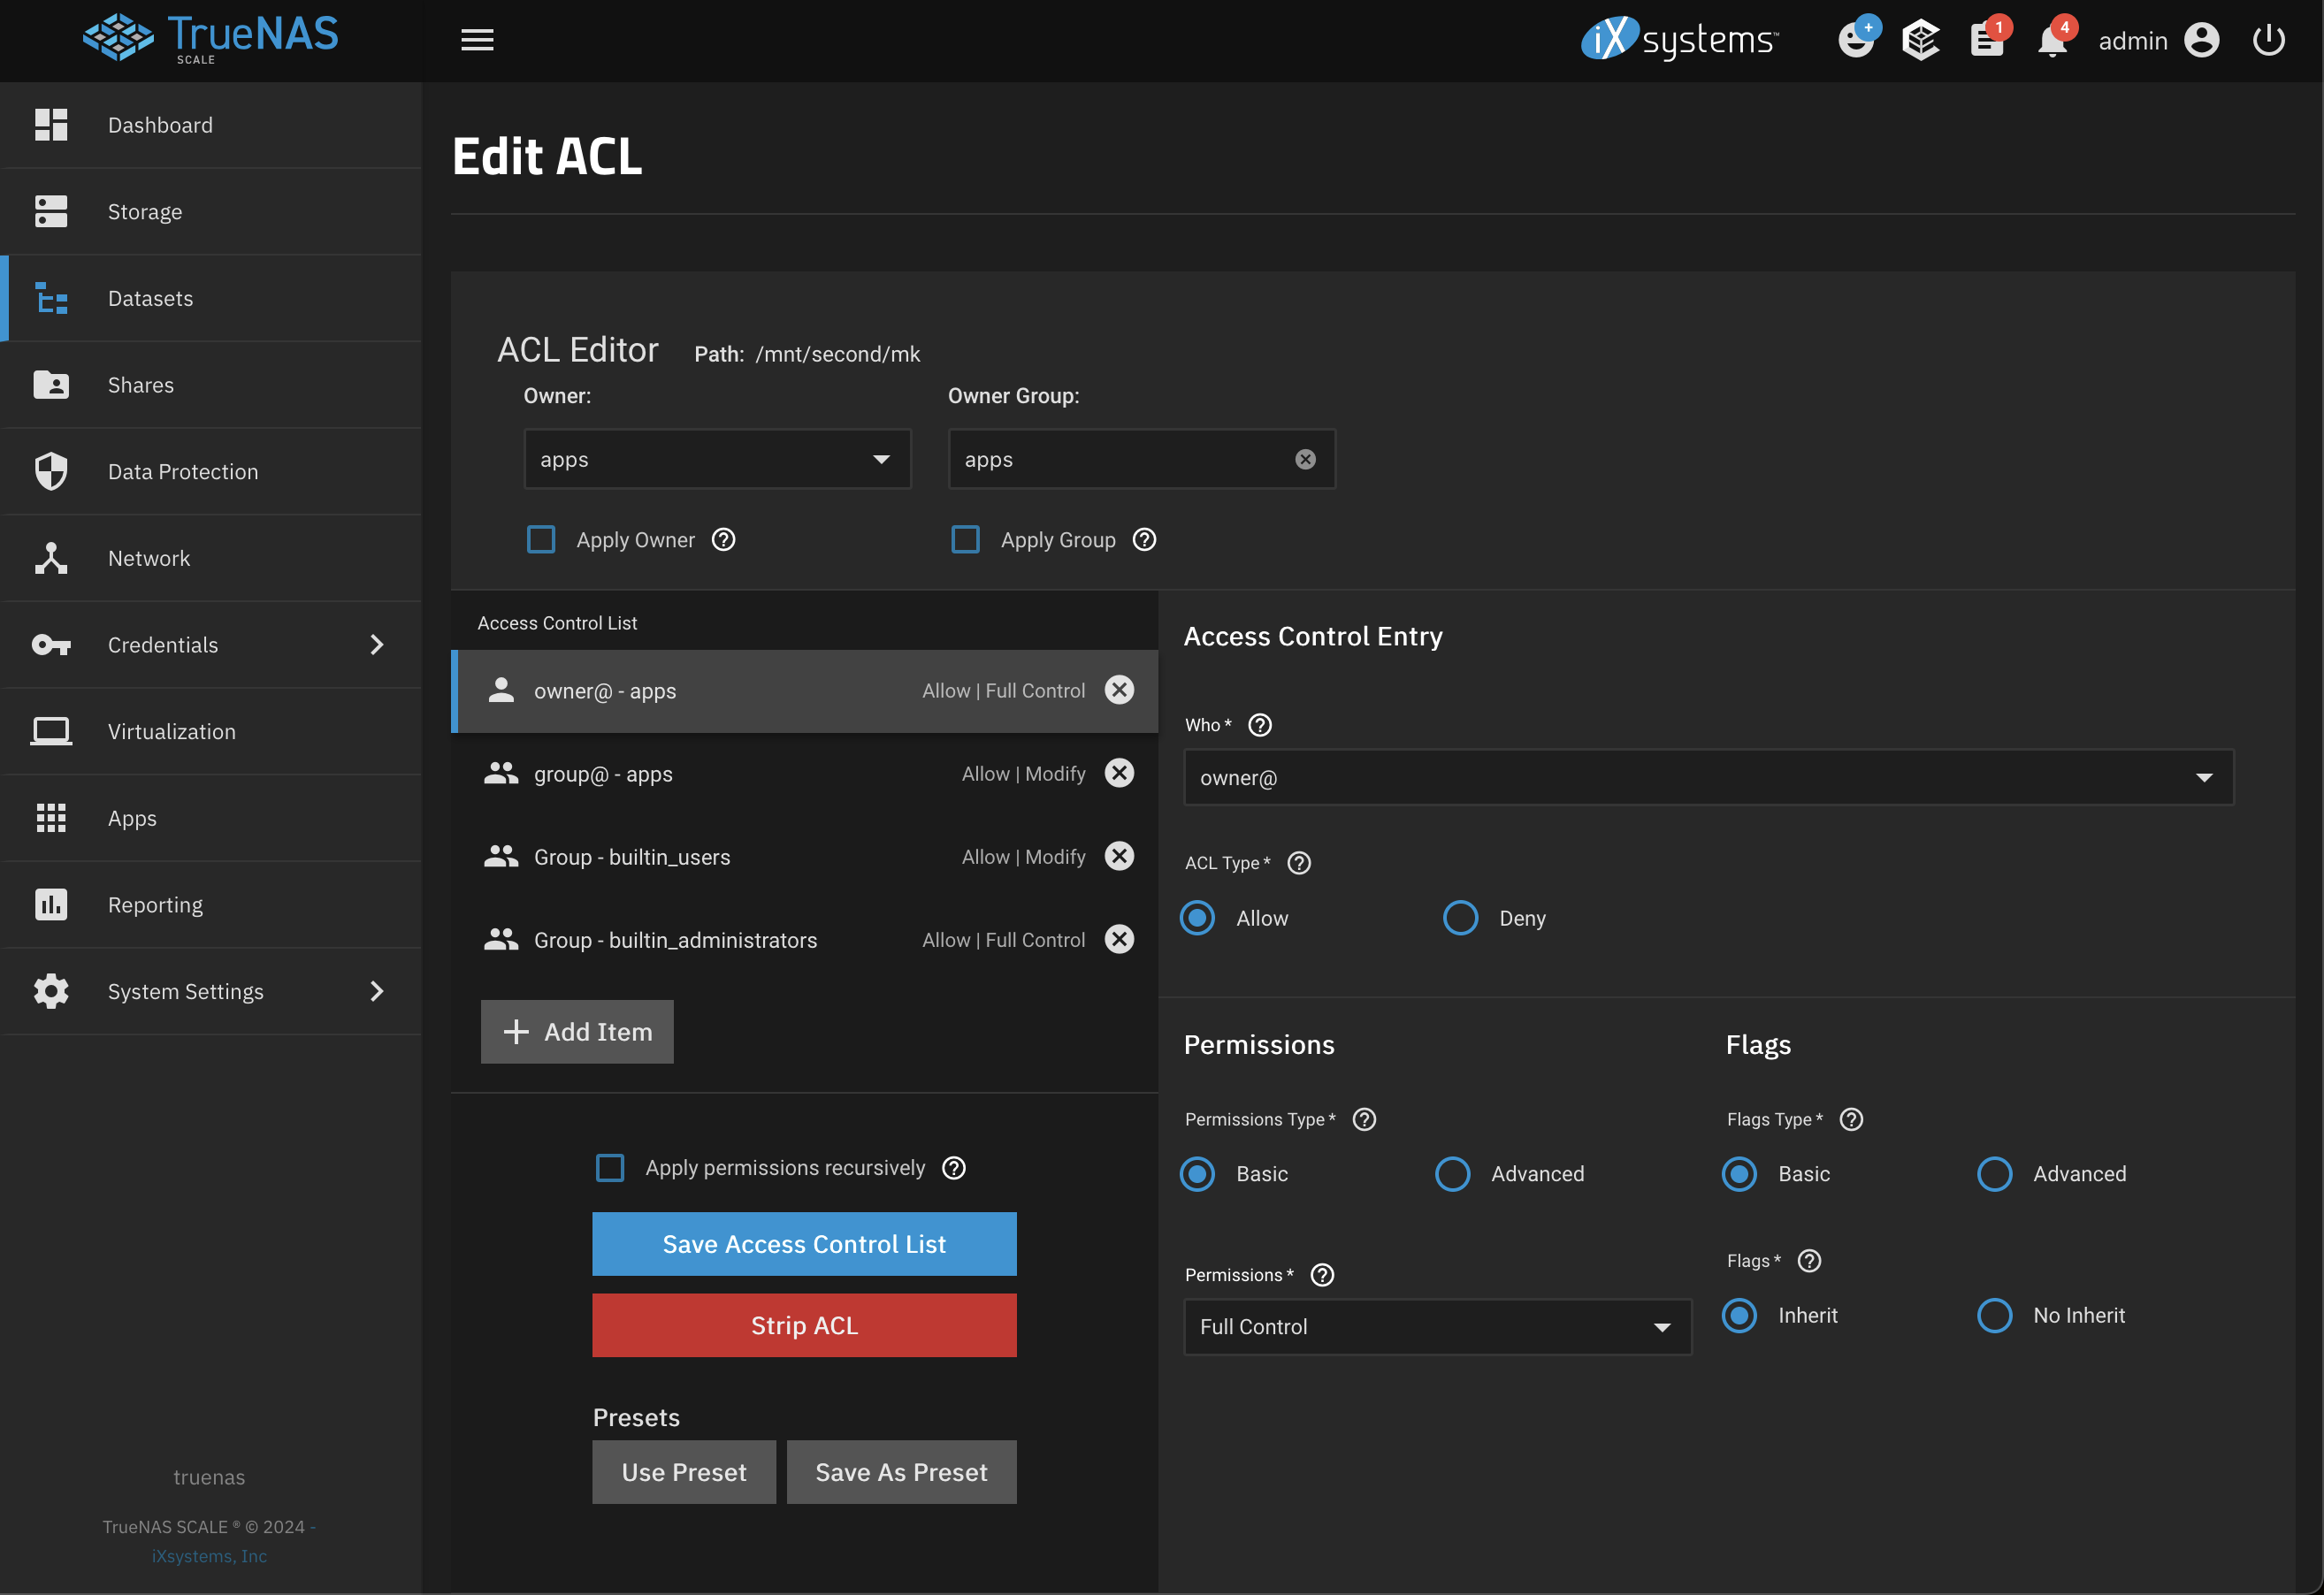
After that, I went to the Dataset page and clicked Add Dataset, but once it was set up I couldn't write on it so also had to make sure that the permission are the same as the other datasets. So I had to click the Dataset in the main panel and then Edit next to Permissions in the bottom right corner, see screenshot:
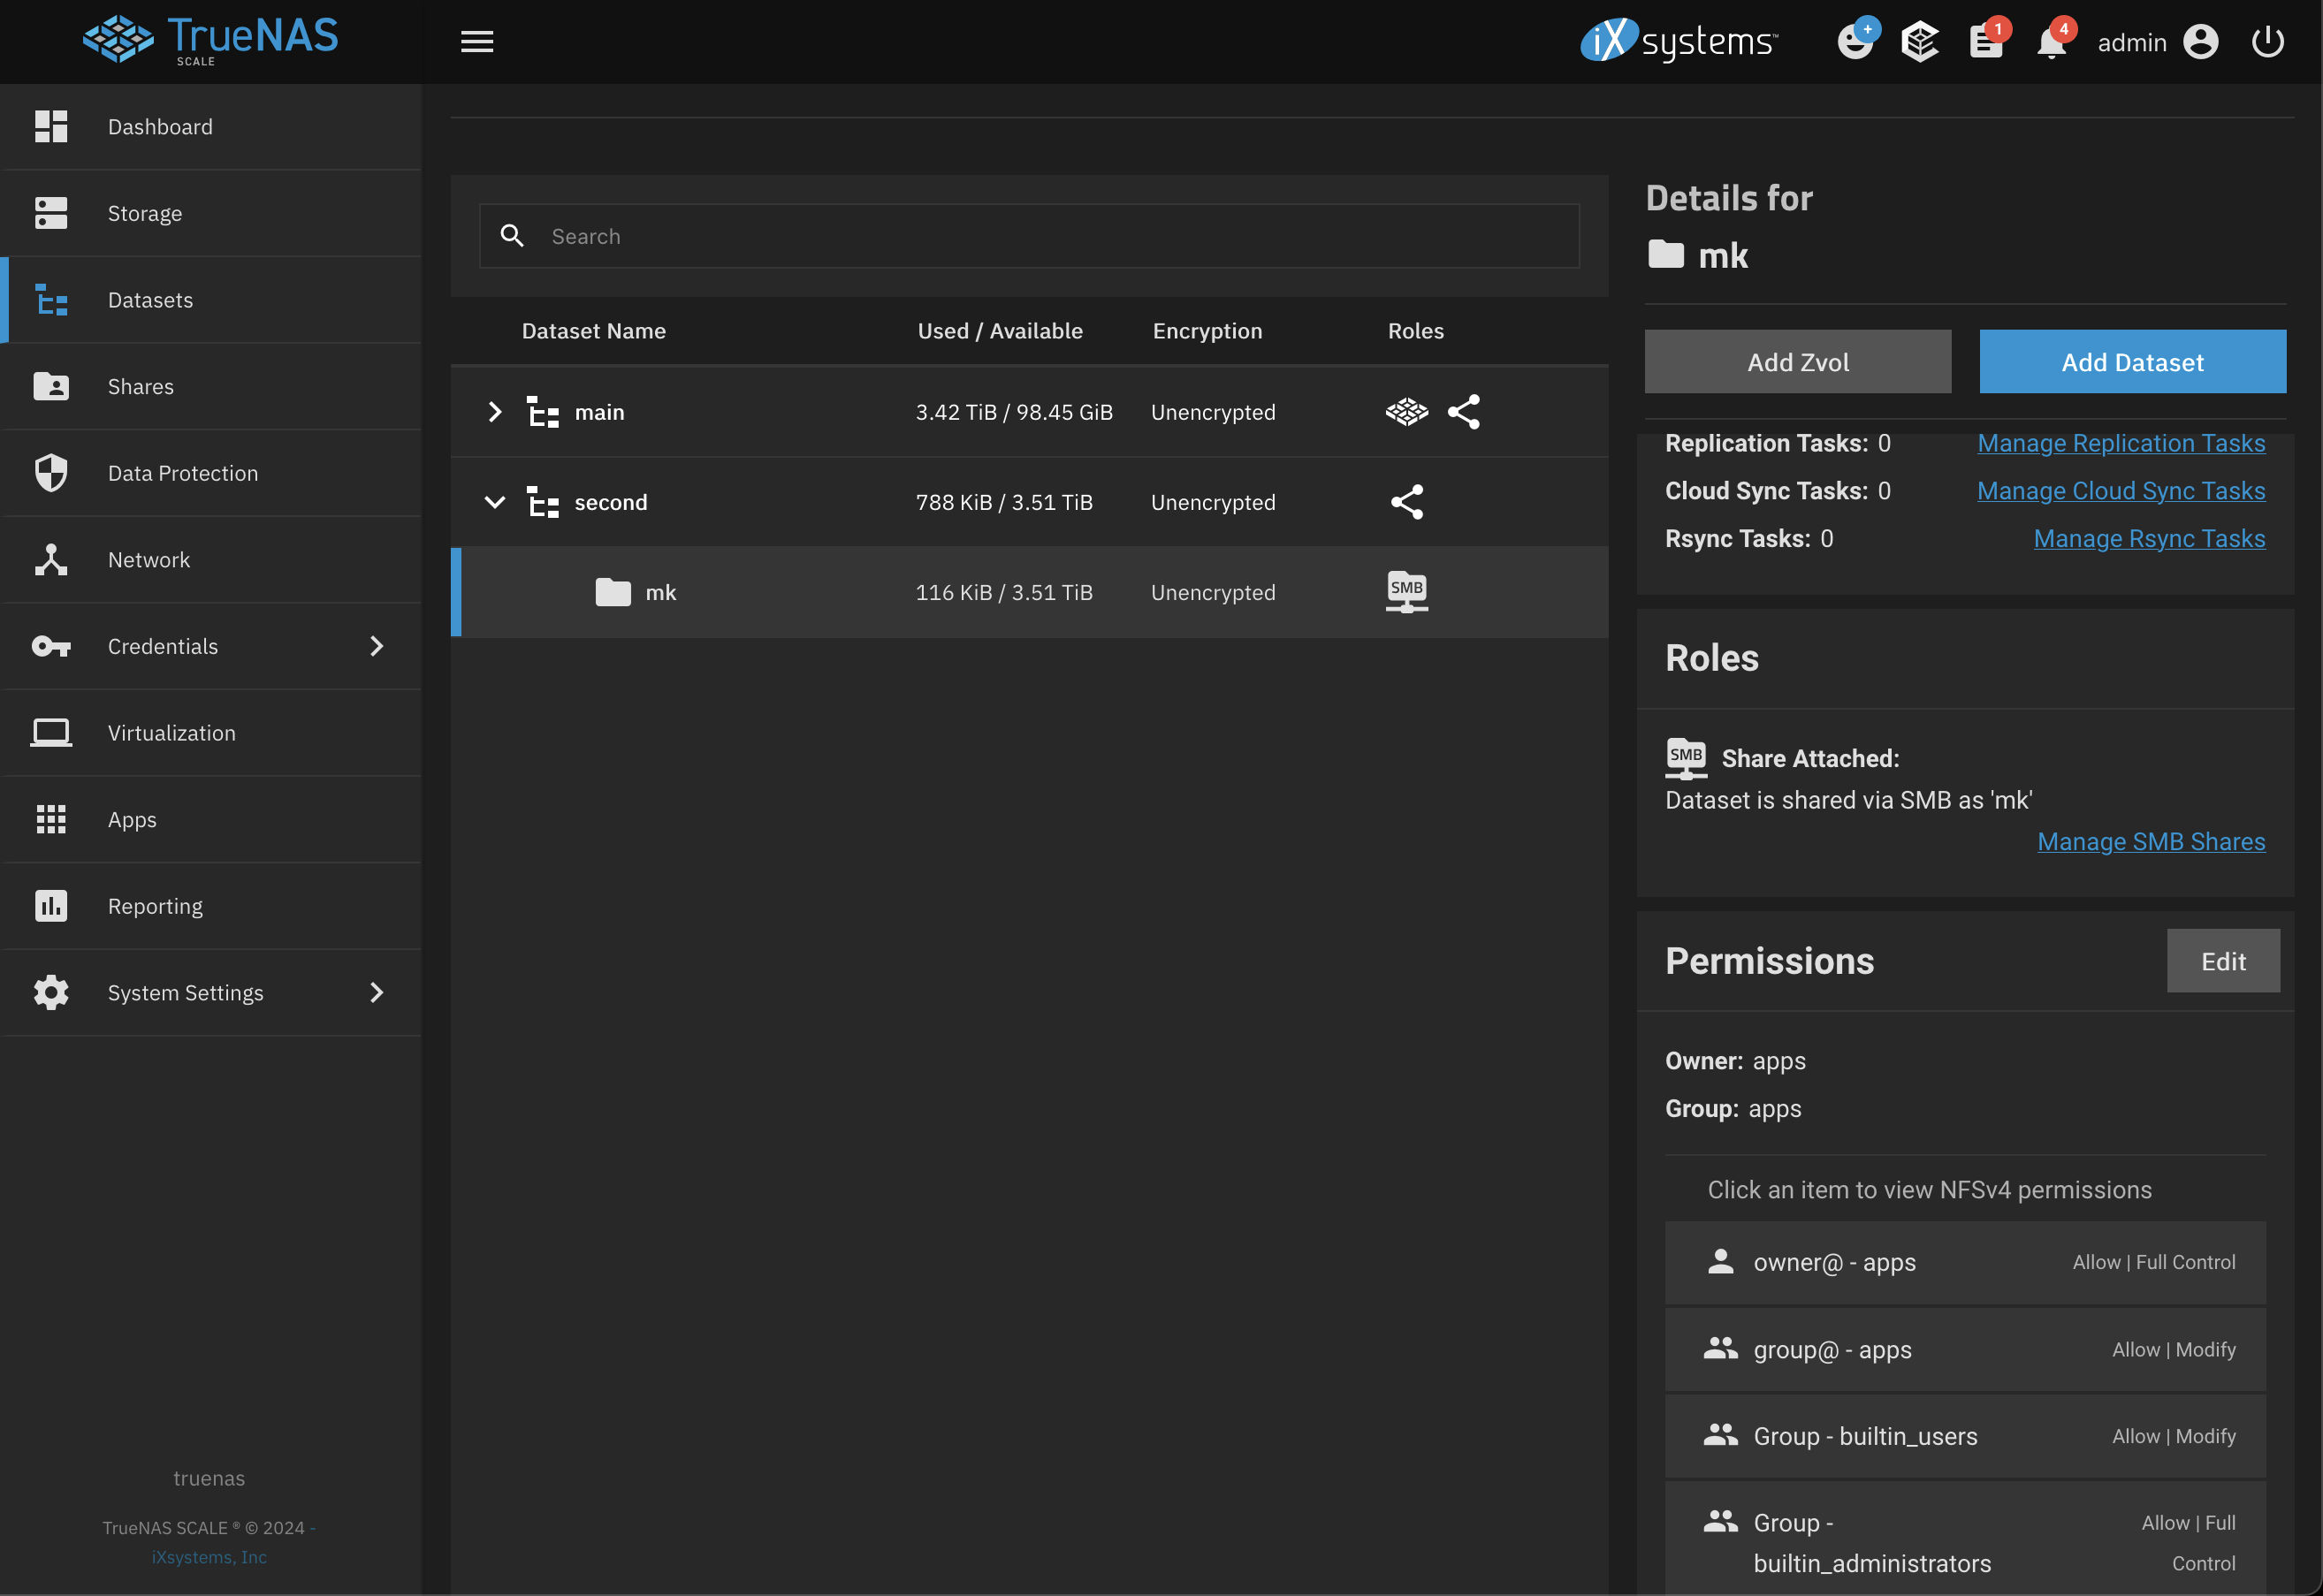
I wanted apps to be able to access it, so gave full control to apps:
Moving over data
The downside of this was that I had to move a massive directory with loads of video recordings between pools.
I'm not sure if there's a built-in tool in TrueNAS to do this, but thought that it shouldn't be too complicated to craft an rsync command to safely, quickly, and resumably copy the files. The particular directory I had to work with is a target for synchronising videos and also I wanted to play it extra safe, so I didn't want to delete files immediately after copying, but instead chose a command that can be used to keep updating the target directory.
You might of course need different options, but this is what I ended up with:
rsync -avzh --delete --no-perms '/mnt/main/photo/Ivana Pixel 6 videos/' '/mnt/second/mk/Ivana Pixel 6 videos'
Once the copying was finished, I redirected the sync script (which is just a cron job moving MP4 files out of the phone Camera folder pushed to TrueNAS using Syncthing) to write to the new path so now my wife can continue recording videos for her course!